This is an internal documentation. There is a good chance you’re looking for something else. See Disclaimer.
User Accounts
Who get what Account?
Where |
Role / Group |
Dev |
Ops/Admins |
|---|---|---|---|
Teamcity |
developers |
x |
|
Teamcity |
admins |
x |
|
SSH Server Access |
@user |
x |
|
SSH Server Access |
@root |
x |
|
SSH Emergency Access |
@root |
x |
|
VSHN |
- |
x |
x |
VSHN SSH |
tocco |
x |
|
VSHN SSH |
toccoroot and tocco |
x |
|
GitHub |
Member |
x |
|
GitHub |
Owner |
x |
|
GitLab |
Maintainer |
x |
|
GitLab |
Owner |
x |
|
Docker Hub |
Owner |
x |
|
S3 |
- |
x |
x |
Nine Cockpit |
Cockpit Access |
x |
|
Nine Cockpit |
Administrator |
x |
|
WireGuard VPN |
- |
x |
x |
Bitwarden |
User |
x |
x |
Sonar |
User |
x |
|
IntelliJ |
- |
x |
TeamCity
Permissions are granted via the admins and developers groups. New permission should generally be granted to those groups rather than individual users.
Create User
Go to Users.
Create User Account
Enter Username (e.g. jdoe for Jane Doe)
Enter full name as Name
Enter Email address (e.g. jdoe@tocco.ch)
Generate a password (
pwgen -s 20 1)Select newly created user (click on username)
Select Groups tab.
Add user to group admins or developers according to the table above.
Remove User
Go to Users.
Remove user
SSH Server Access / Emergency Access (Ansible)
Allow Access
Access can be granted via roles/ssh-key-sync-old/files/ssh_keys in the Ansible repository.
Changes can be deployed via Ansible:
cd ${ANSIBLE_GIT_ROOT}/servers
ansible-playbook -i inventory playbook.yml -t ssh-keys
Hint
Users with role
@userhave access as user tocco on some hosts. User with role@roothave access as tadm and tocco on all hosts. For users that should only have access to Pseudo-VPN using SOCKS5 over SSH, use role@remote.
Revoke Access
See Allow Access above and do the opposite.
VSHN
Create Account
Customer Admins can create accounts at https://control.vshn.net/users/tocco
Select the following Portal Roles:
Customer Admin (ops)
Customer Developer (dev)
Customer Ticket (everybody)
And the following Service Aceess:
Customer Portal (everybody)
GitLab (ops / root user)
Icinga Web 2 (everybody)
Tocco OpenShift OCP4 (dev/ops)
OpenShift:
Have user added to group tocco-dev (dev)
Have user added to group tocco-admin (ops / root users)
Create a ticket to have user added to group. See TOCO-575.
Remove Account
Customer Admins can remove accounts at https://control.vshn.net/users/tocco
VSHN SSH
Grant Access
Puppet configuration can be found in the tocco_hieradata repository. Access is defined in the
userssection within the different config files (e.g. indatabase.ymlfor database servers). Also add the user to ${ANSIBLE_REPO}/servers/ssh_keys.yml for tocco-backup-transfer.Hint
Users that are part of the group
toccorootcan use sudo to obtain root priviledges.Once the user has been created on the server — this can take up to 1h — roles on Postgres have to be updated:
$ cd ${ANSIBLE_REPO}/servers
$ ansible-playbook playbook.yml -t postgres,tocco-backup-transfer
Revoke Access
To remove an account, add an
ensure: absent.
GitHub
Add User to Organization
Go to the People page and Invite member.
Remove User from Organization
Go to the People page and select Convert to outside collaborator….
GitLab
Add User to Group
Go to the Members page and add the user.
Remove User from Group
Go to the Members page and remove the user.
Docker Hub
Add User to Organization
Go to the Docker Hub’s Members page and add the user.
Remove User from Organization
Go to the Docker Hub’s Members page and remove the user.
S3
Create User
User name should be dev-${SHORT_NAME}. For Instance, the user name for Jane Doe would be dev-jado:
tco s3 create-user dev-${SHORT_NAME}Printed access_key and secret_key need to be handed to user and configured in ~/.aws/credentials
Grant permissions:
cd ${ANSIBLE_GIT_REPO}/tocco
ansible-playbook playbook.yml -t s3-permissions -e batch=10
Remove User
tco s3 remove-user dev-${SHORT_NAME}
Nine Cockpit
Add User
Login at https://cockpit.nine.ch
Send invite to @tocco.ch mail address
Select Administrator (ops/admin) or Cockpit Access (dev) as role.
Remove User
Login at https://cockpit.nine.ch
Open Permissions for user
Remove all permissions
WireGuard VPN
Add User / Device
Groups:
Group |
Description |
|---|---|
dev |
Developers within the dev or BS team. |
devops |
DevOps team |
others |
Everyone else VPN for others is only set up upon request. |
Every group is in another IPv6 network to allow restricting access per group easily. See Network Topology
Get public key from user
Use this as <PUBLIC_KEY> in the config below.
User instructions: Set up Wireguard VPN
Go to https://firewall.vm.tocco.ch/ui/wireguard/general#peers
Find an unused peer in the right group.
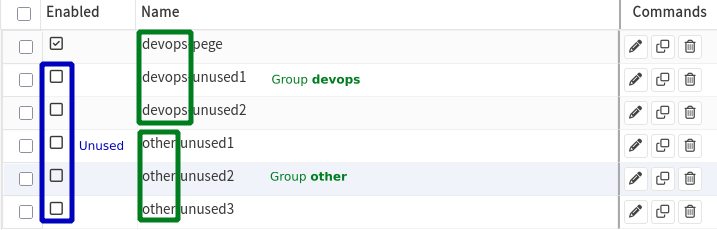
If there is no unused peer, find the peer with the highest IP withing the correct group and increment all IPs by one.
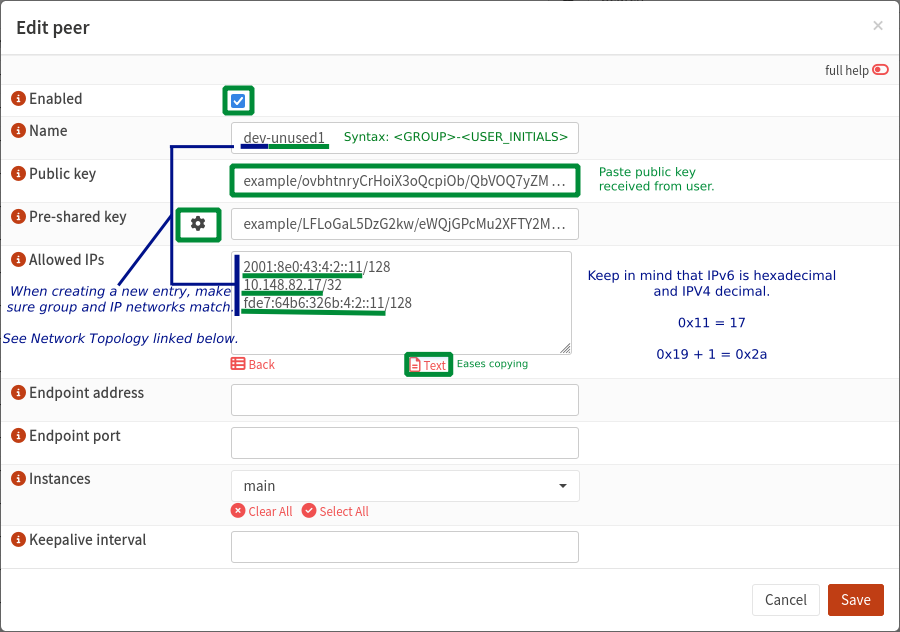
Enable and configure peer
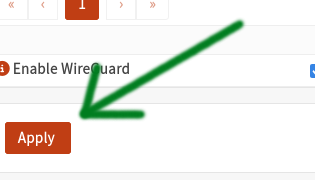
Apply settings
Create config
Replace bold placeholders, <PRIVATE_KEY> is for the user to replace.
Use prefix length as shown below, don’t copy them from OPNsene.
[Interface]
Address = <GLOBAL_IPV6>/64, <SITE_LOCAL_IPV6>/64, <PRIVATE_IPV4>/22
DNS = 2001:8e0:43:4::1, 10.148.80.1
PrivateKey = <PRIVATE_KEY>
MTU = 1280

[Peer]
PublicKey = a67xKEFmHshfOroyaQLX1NXYryjSFqbB5X4VsHnXTCE=
PresharedKey = <PRESHARED_KEY>
AllowedIPs = ::/0, 0.0.0.0/0
Endpoint = wireguard.tocco.ch:51820
Send config to user
Add user to servers/vpn_peers.
This file is parsed by tco:
Be sure to use standard-compliant JSON (no trailing commas).
Check if IP is already listed.
Be sure to use the right group (e.g. dev, devops, or other)
-
Use the record name you used in vpn_peers.
Remove User / Device
Go to https://firewall.vm.tocco.ch/ui/wireguard/general#peers
Disable peer
Apply settings
Remove user from servers/vpn_peers.
This file is parsed by tco:
Be sure to use standard-compliant JSON (no trailing commas).
Remove DNS record for tocco.ch
Search for the IP.
Bitwarden
Invite new User
Login to Webvault as admin@tocco.ch
Click on the green “Invite member” banner at the right upper screen
Enter the users mail address, choose the member role “User” and add it to the corresponding groups
Wait until the user accepts the invite which switches its state to “needs confirmation”
Confirm the user in the members overview via the three dots on the right side of the screen
Remove User
Login to Webvault as admin@tocco.ch
Click the three dots on the right side of the screen, next to the user that needs to be removed
Choose the “delete” option
Sonar
Create User
Login at https://sonar.tocco.ch/
Go to Administration > Security > Users
Choose Create User
Remove User
Login at https://sonar.tocco.ch/
Go to Administration > Security > Users
Deactivate user
IntelliJ
Inform Head of DevOps team to take care of the license management for the new employee.